ZERO Movements
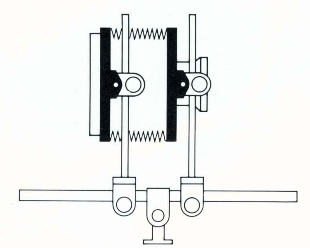
Front Standard Rise
Rising and Falling
Movements
The rising and falling adjustments of the front and rear standards have
a comparable effect: they move the position of the imago relative to the
film without having to tilt the entire camera up or down. In effect, these
movements place the film nearer to the edge of the circle of illumination
or field. of the lens. Therefore. the extent of the vertical movement
depends on the covering power of the lens. Definition and light intensity
often falls off at or near the edge of the field, particularly with short
focal length lenses.
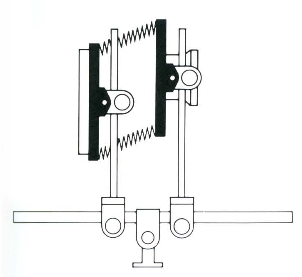
In cameras with limited vertical adjustment. you can often use movements
to augment one another when one alone does not give the desired result
For example. if the lens board cannot be moved down vertically from the
central position. you can duplicatethe adjustment indirectly by tilting
the camera bed, or base. downward, and then restoring the lens board and
back to the vertical position. Because the film and lens planes remain
parallel. regardless of how much up or down shift you use, no change in
the shape or geometry of the image occurs—only its relative position
on the ground glass is altered. The shape of the subject changes only
when the plane of the film and the subject are not parallel.
What does all this
mean in terms of controlling the image? On a minor scale. such movements
allow you to hone your compositions after the camera position has been
set—a kind of in-camera cropping device. But more importantly. rise
and fall movements allow you to control the convergence of vertical lines
within a scene—in photographing a tall
building. for example.
Expose AT LEAST 4 sheets of film and develop them before class on Tuesday
1) Find three subjects with strong vertical components that you can look up to or down on-
Architecture, Person, Object(s)2) Place the camera low or high so that you would have to tilt the camera up or down to frame your subject.
3) Using the bubble level - Keep the camera standards vertical.
4) Use the front standard in a rise or fall to place your subject in the frame, correcting for converging lines.
5) Meter the subject, use the Quick Disc to determine if you need to compensate for bellows extension.
7) Use your digital camera to shoot your subject from the same camera position, zoom to match the same framing.
8) check the digital image to see if the lighting and subject matter looks the way you want.
6) Set your f/stop and shutter speed on the view camera and make one exposire on your film.
Repeat this with the remaining 2 subjects.
7) Experiment with lateral shift instead of rise/fall for at least one image