Mounting and Matting Photographs
Why mount or mat photographs:
Presentation- images look better when held flat and isolated from the surrounding environment Protection- photographs are protected from damage by handling. Archival materials protect the print from chemical contamination. Framing- window mats separate the image from the framing glass.
Prints can be mounted using a special cold mount adhesive, spray adhesive, special double stick adhesive and dry mounting. In this class we will use the dry mount press.
Print preparation:
Prints should be of the highest quality. They should be processed completely with adequate fixing and washing to ensure longevity. Any dust spots and scratches should be retouched. Leave the border on the print.
Mat Board:
There are many types and grades of mounting board based on archival properties, thickness, surface texture and color. White or off white board is most common for photographs and are the only colors that should be used in this class.
Mat board should protect the photograph, not chemically deteriorate it. The wrong board can discolor the print. Inexpensive board is made from paper and may contain acids that will harm the photograph. Medium grade paper board (Conservation Board) may be created “acid free” or treated (buffered) to neutralize the acid and protect the photo for decades. Museum quality boards are made from cotton (100% rag) rather than paper and are highly archival, containing no acid.
Mat board comes in different thicknesses or weights sometimes measured in “plys.” The most common weight for mounting photographs is 4 ply.
Size: Mat board comes in full sheets of 22” x 30” and 32 x 40 and also in pre-cut sizes. The size of the mat depends on the size of the photo and aesthetic considerations. Standard pre-cut sizes are 11” x 14”, 12” x 16” and 16” x 20”. For our images on 8” x 10” paper we will mount on 11” x 14” board.
Equipment and supplies:
Mat Knife Cutting Surface Ruler Dry mount press Tacking iron Dry mount tissue Paper trimmer Cover paper Pencil Kneaded eraser
For window mat:
Photo corners Linen tape Mat cutter Photo quality tape
Paul Pearce www.properproof.com
| Standard dry mount procedure: | |
|---|---|
| Have mat board cut to size and untrimmed, spot-toned print 1) Turn on Dry Mount Press set to 200 degrees 2) Turn on Tacking iron | Using the Centering T-Square 1) center the mat board on the stationary ruler2) use T-square to center print left to right 3) turn on side to align top to bottom or use a separate ruler- center or leave more room on bottom |
| 3) Remove any dust from print on both sides | |
| 4) Use tacking iron to attach dry mount | |
| tissue to back of print with X pattern 5) Use paper trimmer to remove white border | center print left to right |
| from photo- photo & tissue are now | |
| exactly the same size | |
| 6) Align the print with tissue face up on the | |
| mat board with ruler or t-square | |
| 7) Protect print with clean paper- hold in | |
| place with a weight | |
| 8) Lift one corner of the print and tack the | |
| tissue in place - make sure print doesn’t | |
| move | |
| 9) Tack the opposite corner - make sure the | |
| print is flat and hasn’t moved. | |
| 10) Check alignment to make sure the print | |
| hasn’t moved | |
| 11) Place mat and print in press, cover with | |
| clean paper sheet | |
12) Clamp press down for 30 seconds (time may vary based on paper weight and brand of dry mount tissue) 13) Remove from press and clamp in cold press for one minute to prevent warping 14) Remove and check for proper adhesion by gently bending board
Over Mat or Window Mat procedure: 2 same sized sheets of mat board, untrimmed print
1) Measure the actual sixe of the image area- subtract 1/4” for each
size- this is the opening size cutting 11x14 mats from full sheet
2) Subtract the opening size from the mat size to determine the border  -32”-
-32”-
size. 3) Using the Logan Mat Cutting system- mark the back side of the mat with pencil lines- all the way to the edge. 4) Use the Logan cutter to cut the opening- (use the anti-crawl pin) 5) Use linen tape to hinge window mat to backing board 6) Position the print in the window - mark the corners with pencil 40” 2) Attach archival photo corners (or make your own) at the marked
corners-leave a little room for the print expand. 3) Insert the print in the corners and check for alignment
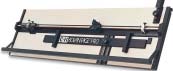
Logan Mat Cutting System
Paul Pearce www.properproof.com