Shooting Black-and-White Film in Medium Format
Today’s
digital cameras are capable of awesome imaging
performance and they offer an unparalleled
combination of convenience, efficiency,
and cost effectiveness that has made them
the dominant mode of image capture. Nevertheless,
shooting black-and-white film, especially
in medium format, is a fascinating and worthwhile
experience that’s rewarding, fun, and
can also go a long way toward making you
a more thoughtful and effective digital
photographer.
Nathan
the Barista: Rolleiflex 3.5E with 75 f/3.5
Zeiss Planar lens and Rolleinar #1 Series
2 close-up lens;
1/60-second at f/5.6; handheld on Kodak
Tri-X Professional
Loading
a roll of 120 film into, say, an old Rolleiflex
twin-lens reflex may seem like a quaint
and tedious procedure compared to inserting
a memory card into your DSLR. Using an exposure
meter, setting the aperture and shutter
speed individually, and focusing manually
certainly takes more time and effort than
using your camera’s built-in auto-exposure
and autofocus systems. And having to wait
for the film to be developed before you
can see the results will certainly test
the patience of those accustomed to assessing
their captured images immediately on the
LCD. However, this “retro” experience
forces you to slow down, take a deliberate
approach, and it gives you that inimitable
feeling that you’re creating something
for the ages. Perhaps that’s why so many
art photographers and creative shooters
continue to shoot at least some of their
work on film, and to favor the traditional
black-and-white medium.
The
image capture system you use does
make a difference!
Yes,
as the saying goes, it’s the person behind
the camera who determines the quality, originality,
and significance of virtually any photograph.
But photography is also a technologically
based art form, and that’s why the type
of equipment and capture medium you use
to create images also has a direct influence
on the final results. If you examine the
pictures on these pages, which I shot on
Kodak Professional Tri-X 120 roll film with
50- to 60-year-old manual exposure twin
lens reflexes (TLRs), they look qualitatively
and emotionally different from what you’d
typically shoot with a modern DSLR. They
have a kind of quiet, contemplative grandeur
that results from the slow, deliberate approach
you must use with this kind of camera and
the limitations it imposes on the photographer.
And the limited depth of field you get when
shooting medium format at large apertures
throws the background and foreground pleasantly
out of focus.

Nathaniel
and Colette: Rolleiflex Automat MX with
75mm f/3.5 Zeiss Tessar lens and Rolleinar
#1 close-up lens;
1/25-second at f/4; handheld on Kodak Tri-X
Professional
With
the exception of the Mamiya C220, all the
cameras I used lack interchangeable lenses
and only focus down to about three feet
(which is why I used Rolleinar close-up
lenses to get closer to the subject, in
some cases). The fact that the viewing image
with a waist-level-viewing TLR is reversed
left to right makes it challenging to follow
action, but it also encourages careful framing
and composition, which is a big plus for
portraiture. And, of course, you’re limited
to 12 exposures per roll, costing roughly
50 cents apiece (not including developing,
scanning, and printing), which really motivates
you to make each one count.
Finally,
using an exposure meter to calculate and
set the exposure encourages you to really
think about the effects of apertures and
shutter speeds on the final image, and to
carefully consider whether you’re exposing
for the highlights, shadows, and mid-tones.
In short, shooting film in a classic TLR
or roll film folding camera forces you to
take a slow, disciplined approach that is
all too often lacking in today’s fast-paced
digital photography, where most users fall
back on their camera’s automation and
the essentially unlimited image-capture
capability of a high-speed, high-capacity
memory card.

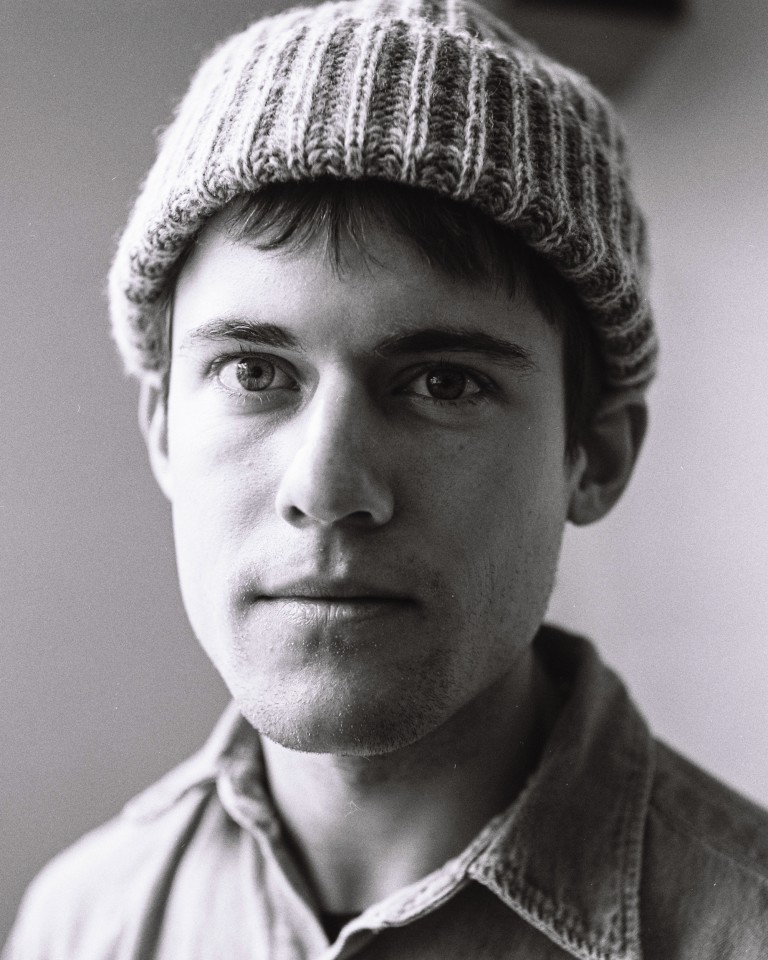
Portrait
of The Artist: Rolleiflex Automat MX with
75mm f/3.5 Schneider Xenar lens and Rolleinar
#1 close-up lens;
1/50 sec at f/5.6; handheld on Kodak Tri-X
Professional
What
you’ll need to get started
If
you already own or have access to a well-functioning,
medium-format roll film camera, all you
really need to acquire is: 120 roll film
(I recommend Kodak
Tri-X or Ilford
FP4 Plus) and an accurate, working exposure
meter. The current Sekonic
L-208 Twin Mate meter is a good choice,
or you can go for a classic used meter such
as the Gossen Luna-Pro. Make sure the meter
you choose is a modern battery-powered type;
older selenium meters are OK, but they generally
aren't sensitive enough to read in extremely
low light.
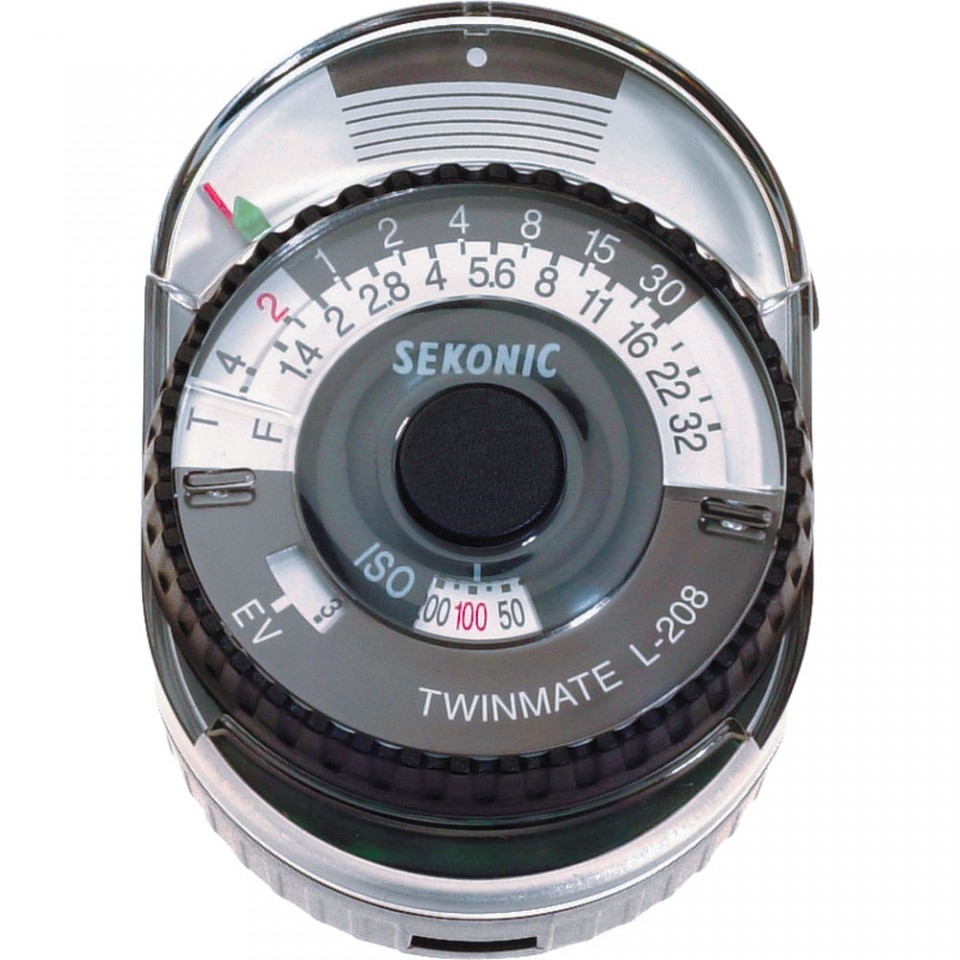
Sekonic
L-208 Twin Mate Light Meter
If
you’re not familiar with shooting roll
film, it’s best to shoot at least 100
exposures to get comfortable and creative
with this medium, and 10 rolls will allow
you to shoot 120 images in the 2-1/4 x 2-1/4-inch
format. If you take your time, this will
be sufficient to give you a new mindset
and perspective that are virtually guaranteed
to enhance your digital shooting capability.
If you don’t have a medium-format camera
available, you can find a good used one
at relatively modest cost in the B&H
Used Department.
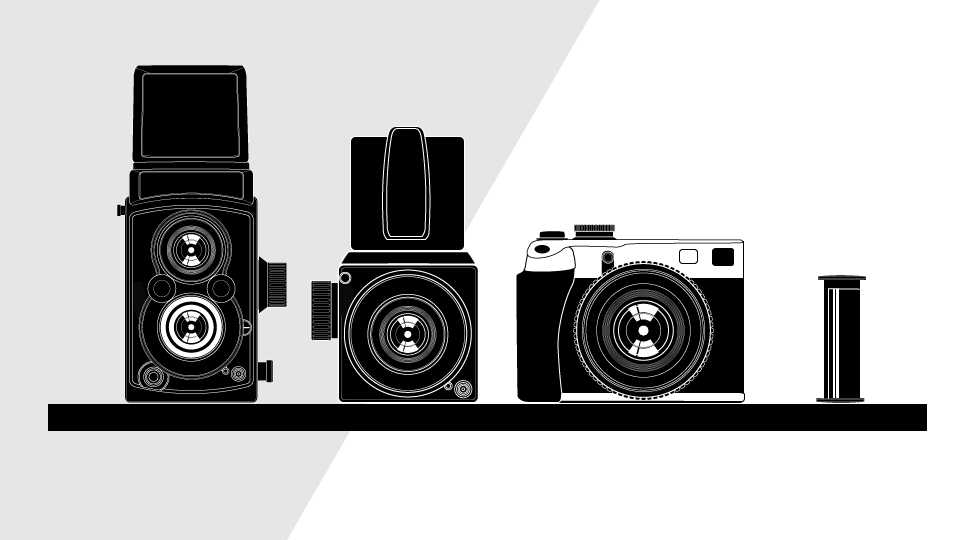
Choosing
a medium-format camera
Medium-format
cameras come in a wide variety of types,
including TLRs, SLRs, solid-bodied press
cameras, and scale focusing and rangefinder
folding cameras in formats ranging from
6 x 4.5cm to 6 x 9cm, and even some panoramic
options going up to 6 x 17cm. Since the
only remaining roll film size that’s widely
available is the paper-backed 120 (220 is
still sold in a limited range) make sure
the camera you pick takes that size film.
There
is certainly nothing wrong with using a
medium-format-film SLR, such as a Hasselblad
500 C/M, Mamiya RB67 or 645, Pentax 6x7
or 645, etc., but for this project I decided
to concentrate on TLRs. They’re simple,
durable designs with quiet, low-vibration
leaf shutters and the fact that they don't
have a flipping mirror allows you to shoot
sharp handheld pictures at slower shutter
speeds. Here are some recommendations:
Rolleiflex:
These timeless classics are the standard
by which other TLRs are judged and they
still command premium prices. However, they
do provide automatic first frame positioning
(no red window or first frame positioning
marks to line up) and automatic parallax
compensation. If you’re on a budget, go
for the Rolleiflex Automat MX of the early
to mid ’50s with a fine, quality coated
Zeiss Tessar 75mm f/3.5 or Schneider Xenar
75mm f/3.5 lens. Late model Rolleis like
the 3.5 F and 2.8 F with Zeiss Planar or
Schneider Xenotar lenses are the cream of
the crop, but they generally sell for a
bit more, depending on condition.
Rolleiflex
3.5E: Perhaps the most affordable, relatively
late model high-end Rolleiflex, it has the
superb
75mm f/3.5 Planar lens and, like all
Rolleiflexes since 1937, it provides automatic
first-frame positioning and
auto-parallax compensation over the entire
focusing range.
Rolleicord:
These little brothers of the Rolleiflex
are simpler in design but do also provide
auto parallax compensation and accept Rolleinar
close-up lenses. Make sure to get one with
a Schneider Xenar 75mm f/3.5 lens and Synchro-Compur
shutter. The most desirable ones are the
late model Va and Vb, the latter with interchangeable
viewing screens. However, older models such
as the III and IV are still very competent
picture takers.
Mamiya
and Mamiyaflex: These rugged, high-quality
machines are the only truly successful interchangeable-lens
TLRs and they hold up very well. Lens sets
from 55mm to 250mm are available, but both
the standard Mamiya-Sekor 80mm f/2.8 and
105mm f/3.5 lenses are of excellent quality.
Older models, such as the Mamiyaflex C2,
Mamiya C22, and C3 are less costly, and
later models such as the C220 and C330 are
more expensive. They’re larger and heavier
than Rolleis, and they focus much closer
without requiring close-up lenses, but they
have no parallax compensation other than
lines on the focusing screen to guide your
framing.
Mamiya
C220: Larger and heavier than the Rolleiflex,
this robust interchangeable-lens TLR can
focus much closer
without accessories, but you have to manually correct
for parallax at close shooting distances.
The standard 80mm f/2.8 Mamiya-Sekor lens
is outstanding, and lenses from 50-250mm
are available.
Zeiss
Ikon Ikoflex: They’re great cameras,
in terms of optics and focusing-screen brightness,
but not as sophisticated as the Rolleiflex
and more prone to mechanical troubles, especially
the film winding and focusing mechanisms.
If you can get one in nice shape at a good
price, it might be worthwhile, and they
sure look very cool. Prices vary widely
but make sure it has a Tessar 75mm f/3.5
lens and Compur-Rapid or Synchro-Compur
shutter.
Zeiss
Ikoflex Favorit: A well-made classic TLR
with sharp 75mm f/3.5 Zeiss Opton Tessar
lens, bright
viewfinder, and built-in selenium meter,
but the film-wind
mechanism is not as reliable as the ones
in comparable Rolleiflex cameras.
Other
great TLRs worthy of consideration:
The Yashica-Mat with an 80mm f/3.5 Yashinon
or Lumaxar taking lens, not other models
with Yashikor or Yashimar lens; the Minolta
Autocord with a Rokkor 75mm f/3.5 lens,
which is often hailed as the second-best
TLR ever after the Rolleiflex; and the Ricoh
Diacord G, a sleeper with a fine-performing
Rikenon 80mm f/3.5 taking lens and bright
viewing system.
Yashica-Mat:
A great value, this TLR is robust and
reliable, with sharp four-element Yashinon
or—in early models—
Lumaxar lenses. The outer bayonet
accepts Rolleinar close-up lenses.
Late-model 124Gs with
built-in CdS Hexanon meters are more expensive
and they have plastic control dials.
Getting
closer, and steadier
If
you want to shoot portraits similar to the
ones shown here, you’ll want to be able
to focus somewhat closer than the three-foot
or so minimum focusing distance of a typical
non-interchangeable-lens TLR. The best answer
is the Rolleinar close-up lens sets made
by Rollei that click into the outer bayonet
mounts of your TLR’s viewing and taking
lenses. There’s a parallax-compensating
prism built into the unit that mounts over
the viewing lens and it provides surprisingly
accurate framing at close distances. Most
TLRs including older Rolleiflexes, all Rolleicords,
and most other TLRs with f/3.5 lenses use
the Rolleinar 1 mount, and the most useful
one is the R1, which gets you down to about
two feet. If you want to get even closer,
there’s an R2 and R3 set.
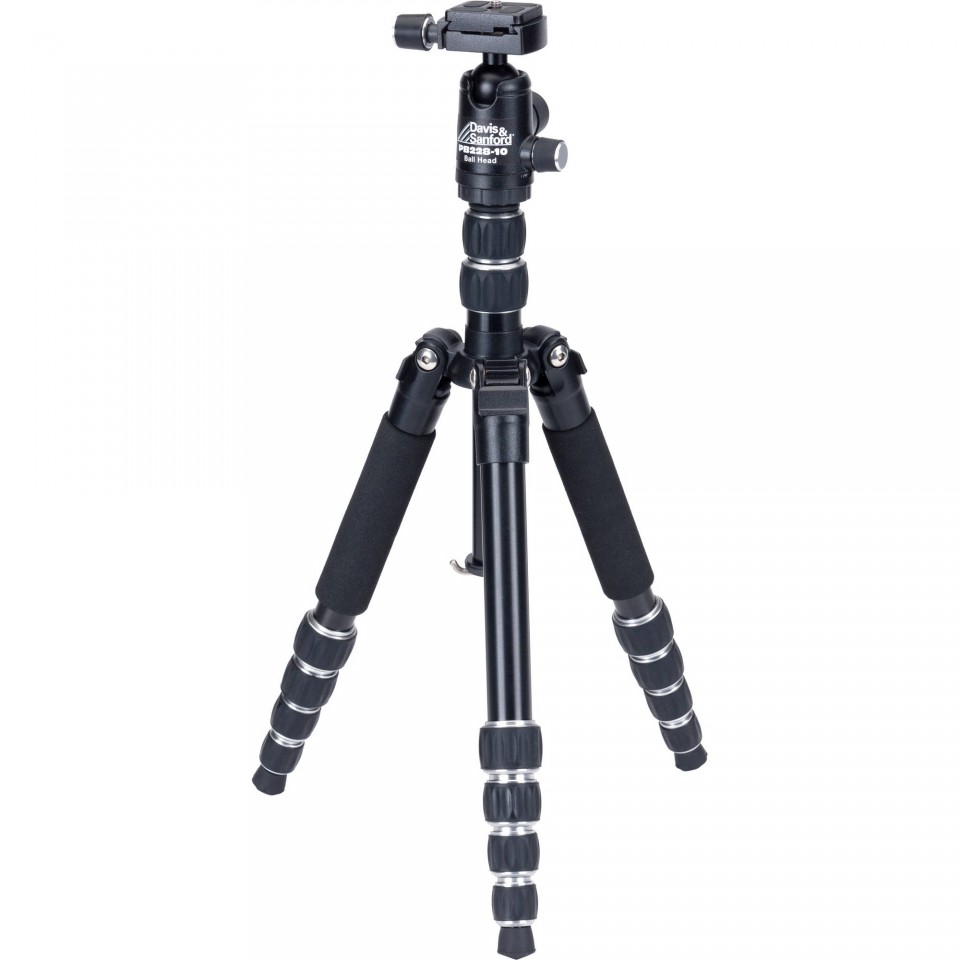
Davis
& Sanford Traverse TR-553-228
Since
TLRs don’t feature super-speed lenses
and if you want to get crisp images, it
helps to use a tripod when shooting at shutter
speeds of 1/60-second and slower. Since
the best tripod is the one you take with
you, I always carry my trusty Davis
& Sanford Traverse TR-553-228, which
folds to 12 inches, extends to 53 inches,
weighs only 2.6 pounds, and will support
cameras up to 10 pounds.
Developing
and printing your medium-format film
Unless
you’re a diehard traditionalist, you probably
don't want to set up a complete wet darkroom
and make prints the old-fashioned way. Fortunately,
these days you don't have to; the only part
of the process that still requires darkroom
chemicals is developing the film. You can
bring your 120 film to a local pro lab;
however, those are becoming relatively scarce
outside of the larger cities. An alternative
is to mail your film to labs for processing,
using pre-paid mailers, or to contact labs
directly. When working with labs, you often
have a choice of traditional developers
to use, such as HC-110 or D-76, as well
as the option to have contact sheets, scans,
and prints of your negatives made at the
same time.
Epson
Perfection V800 Photo Scanner
You
can, of course, also scan your own medium-format
negatives at high resolution by opting for
a format-compatible scanner, such as the
Epson
Perfection V800 Photo Scanner
or the Epson
Perfection V850 PRO, which has enhanced
software options and additional film holders,
and then print them out yourself on any
high-quality inkjet photo paper of your
choice. If you’re in the market for a
printer that turns out excellent black-and-white,
I strongly recommend that you get one that
uses pigmented inks and an ink set that
provides at least three gray/black inks
to achieve optimal tonal gradation. Here
are some suggestions: Epson
Stylus Photo R3000 Inkjet Printer, which
has a maximum print size of 13 x 19 inches
and uses a nine-ink set; Epson
Stylus Pro 3880 Inkjet printer, which
increases the maximum print size to 17 x
22 inches and also uses a nine-ink set;
or the Canon
PIXMA PRO-1, which has a 13 x 19 inch
maximum output size
|