
f/1.7~ ~ ~ f/2~ ~ ~ f/2.8~ ~ ~ f/4~ ~ ~ f/5.6~ ~ ~ f/8~ ~ ~ f/11~ ~ ~ f/16
SHALLOW DOF ~~~~lens apertures - smaller number = bigger opening ~~~~DEEP DOF
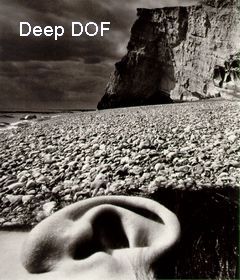
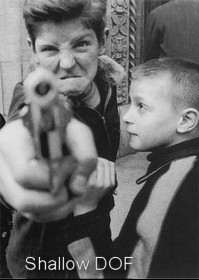
Controlling Depth of Field overview
Depth of field is the distance in front of and behind the subject that appears to be in focus. You focus the lens on one part of the image, the lens opening (aperture or f/stop) determines the depth of field. A large opening (f/2) creates shallow DOF with only one point in focus. A small opening (f/16) creates deep DOF with extended focus from near objects to distant object.
In this assignment
you will use the aperture to alter the degree that your subject is in
apparent focus. You look through your camera with its lens at maximum
aperture, the smallest number of your f stops. This gives you the brightest
view and facilitates focusing because at its widest aperture your lens
has the smallest depth of field. What you see in the viewfinder is what
you get.
When you "stop the lens down" or turn it to the smallest aperture,
the depth of field is extended in front of and behind the distance where
you focused. If your camera has a "depth of field preview" feature
you will be able to see this change in the viewfinder. The image will
get dimmer but the degree of sharpness will be apparent.
If your camera has a distance and depth of field scale on your lens, you
will be able to calculate the depth of field to make sure the subject
matter you want in focus is included.
If your camera doesn't have a depth of field preview and scale on the lens, you will have to go on faith that the effect will happen. Remember that the DOF extends in front of and behind the area you see in focus. To include two subjects in focus you need to focus between them.
|
Assignment
requirements: Use
a tripod, don’t move the camera, don't change focus between
images, just aperture and shutter speed. |
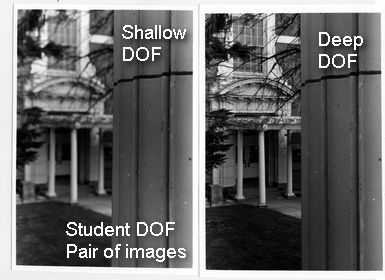
| Two
Prints (5X7): Make two photographs of the same subject. One will show deep depth of field and the other shallow. These two exposures should be taken from exactly the same position - they should look the same except for the change in depth of field. Be sure to check your light meter to avoid over and under exposure. One 8X10 Print showing the strong effect of DOF (either deep or shallow) This doesn't have to be one of a pair - you can You will turn in your film log and contact sheets that show how much effort you put into this assignment. Make sure everything that you turn in is labeled. Name - Date - Roll # - Frame # |
|
I have included a depth of field calculator on the site if you want to plug in the numbers and see what should be in focus. |
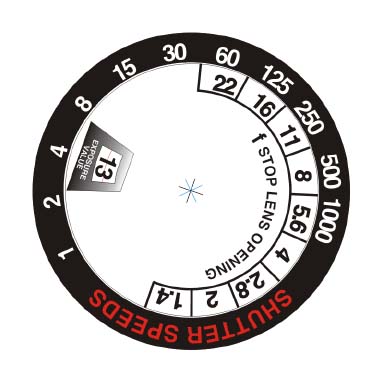 Exposure
Calculation Wheel for download
Exposure
Calculation Wheel for downloadMonday February 24, 2014