
Large format class
How To Solarize Black and White Photography - The Sabattier Effect
Solarization or the Sabattier Effect
Solarization
is the process of re-exposing photographic paper during the
development process.
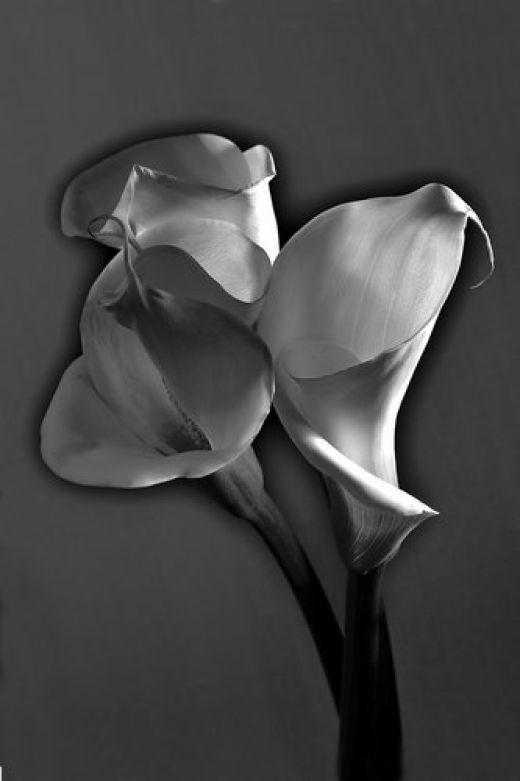
The result is an eerie silver image which contains light lines
between the shadows and the highlighted areas.
Areas that have been exposed the least are affected the most during the re-exposure of the print. The darker areas or shadows on the prints show little change during the solarization process.
The Sabattier
effect is a fairly easy process to achieve and can be done in
a few easy steps.
The Process of Solarization
To begin
the process, develop and agitate your paper normally.
When the image begins to appear, remove the print from the developer
and place it into a tray of water for about ten seconds.
This will slow the development process.
The next
step is to re-expose the paper to light.
This exposure should last only about two seconds.
The light source should be a low watt bulb, 15 to 20 watt, and
should be three to four feet away from the print.
The final
step is to put the paper back into the developer for the remaining
development time.
Complete the process of development using your stop bath, fixer
and final wash.
In order
to achieve the desired effects you may need to experiment with
different exposure times.
Two seconds is a good starting point, but you may need to vary
the tone up or down depending on the print and the type of paper
used.
Tips for gaining maximum results.
- Using high contrast papers will give you a more dramatic effect.
- Slow films are easier to work with since they require longer exposure time to develop.
- Since re-exposure effects the highlights, use a print with a lot of light areas to achieve the most dramatic results.
- Dilute your developer
to twice the manufacturers recommendations.