Depth Of Field
Controlling focus areas in the image
Controlling Depth of Field
Depth of field is the distance in front of and behind the subject that appears to be in focus. You focus the lens on one part of the image, the lens opening (aperture or f/stop) determines the depth of field.
In this assignment you will use the aperture to alter the degree that your subject is in apparent focus.
If your camera has a distance and depth of field scale on your lens, you will be able to calculate the depth of field to make sure the subject matter you want in focus is included.
Your goal is to demonstrate that you can control the amount of focus in an image by changing the Depth of Field.
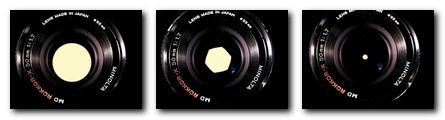
You look through your camera with its lens at maximum aperture, (the smallest number of your f stops.) This gives you the brightest view and facilitates focusing because at its widest aperture your lens has the smallest depth of field. What you see in the viewfinder is what you get.
When you "stop the lens down" or turn it to the smallest aperture, the depth of field is extended in front of and behind the distance where you focused.
If your camera has a "depth of field preview" feature you will be able to see this change in the viewfinder. The image will get dimmer but the degree of sharpness will be apparent.
Phase One
Make a series of photos with different degrees of focus
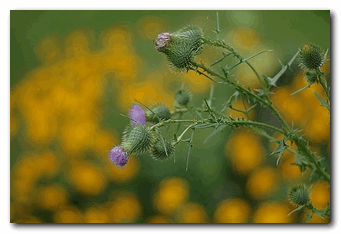
A large opening (f/2) creates shallow DOF with only one point in focus. A small opening (f/16) creates deep DOF with extended focus from near objects to distant object.
Assignment requirements:
Select different subjects that will show the effects of changing DOF.
Shoot a series of photos with each subject to create shallow and deep depth of field. [Isolated Focus and Everything in focus]
You should try a variety of subjects in varying light and at different distances to see what effect changing the aperture does to the image
Remenber that changing the focal length (Zooming the lens) will affect the changes in depth of field.
Try the same subject with both wide angle and telephoto zoom settings.
Subject matter is your choice; Your image should include a subject or subjects that extends over some distance,
you can't show depth of field with a flat subject therefore- Have something in the foreground and the background.
Use a tripod, don’t move the camera, don't change focus between images, just aperture and shutter speed.
As you learned in the motion assignment, you have to have the right lighting to accomplish this.
USE MANUAL FOCUS- DO NOT CHANGE THE FOCUS ON YOUR LENS BETWEEN THESE SHOTS!
Do not try this part of the assignment in direct sunlight.
With your tripod it can be done in fairly low light. Shallow depth of field is impossible to get in very bright sunlight . Changing the ISO to a higher number canl allow more depth of field- Lower number less- because you can change the aperture (f/stop).
1) Find a subject that you can get pretty close to that has something far away in the background. Direct sunlight is too bright to allow shallow depth of field. Cloudy or shady outdoor light and bright indoor light should work best. The light in our classroom is just about right. When starting out you should simplify what you shoot. Pick something that won’t stop or move away as you set up to shoot. The lighting should also be consistent.
If you subject is lighter or darker than "medium gray" make exposure value adjustments to get the correct exposure. Make sure your white balance is correct.
2) Set up your tripod and compose your photograph, framing to concentrate on thesubject and eliminate distracting elements. You will make multiple exposures at different aperture openings without moving the camera.
3) Set your camera to "aperture priority" and check the exposure settings.
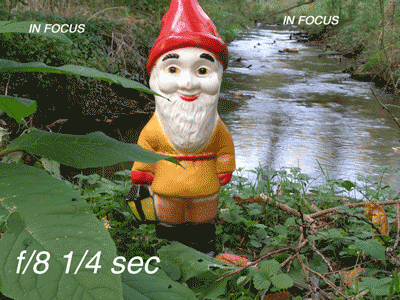
4) First Exposure - Adjust your lens opening (f/stop) to the smallest opening (highest number) like f/16.
This will require a long shutter speed to give you the proper exposure.
5) Second Exposure -Change your lens opening to the largest opening (lowest number) like f/2 or f2.8
In aperture priority your shutter speed will change to get the proper exposure.
Your shutter speed should be much faster. Make your second exposure.
If the lighting is not optimal, you might have to change the ISO to use the largest and smallest lens openings.
Phase Two
Experiment with different depth of field techniques.
You don't need to bracket these shots
Remember the techniques we discussed in class-
Shoot a variety of images to try out the different effects.
Save your mistakes to try to learn about the way timing affects images.
You will select the best of your photos to share in class.
FINISHING UP in your Final DOF Folder:
Shoot) Original Shoot files
Share) Animated GIF files, plus Additional strong images demonstrating strong depth of field effects (deep and shallow)