Burn and Dodge Exercise
Burning and dodging is the simple technique of altering the exposure of selected areas of your print. Your basic overall exposure is determined by the initial test strip to determine "minimum time for maximum black..
You may decide that parts of your image need to be lighter or darker. Often a sky needs darkening for dramatic effect or a face might need to be lighter.
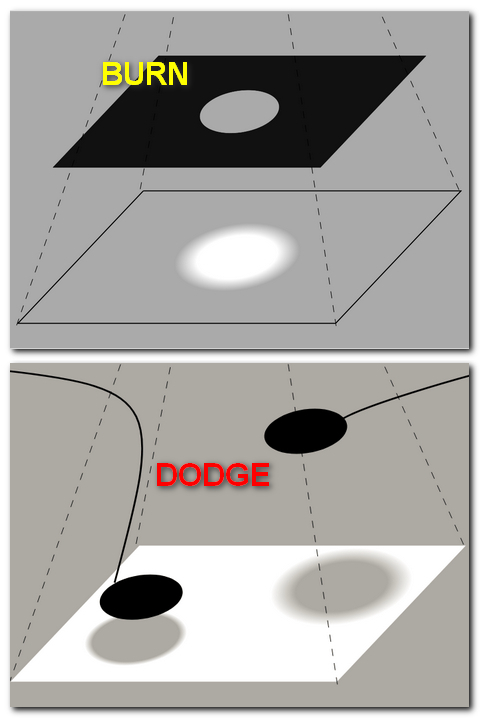
Adding more exposure than the basic exposure is considered BURNING.
Holding back exposure is considered DODGING.

TOOLS
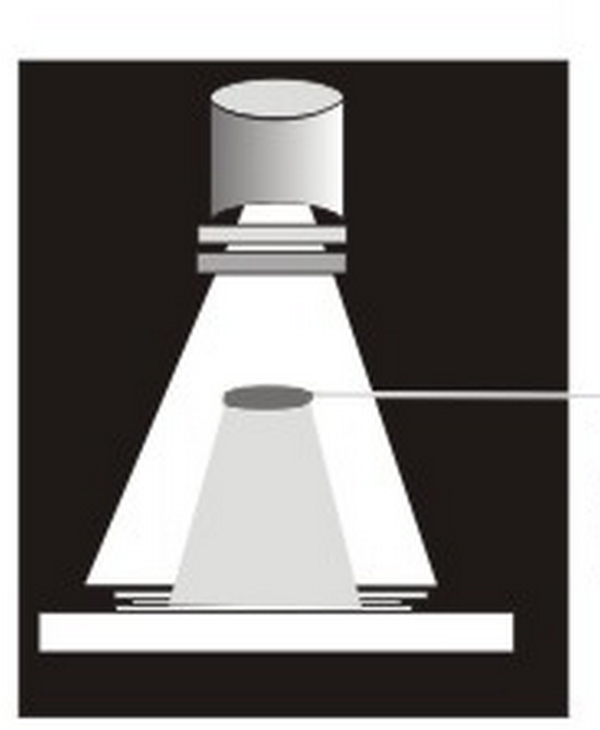
Burning & Dodging tools are simple cardboard cutouts, sometimes attached to wire. You can also just use your hand.
To keep the edges of the affected area smooth or "feathered" you hold the tools about halfway between the lens and your paper. You keep the tool moving slightly to prevent noticeable lines or edges.
Contrast Control Sheet .pdf

In Class Exercise
Use one sheet of paper
Cut it into four pieces -
2 pieces I/4 sheet
2 test strips
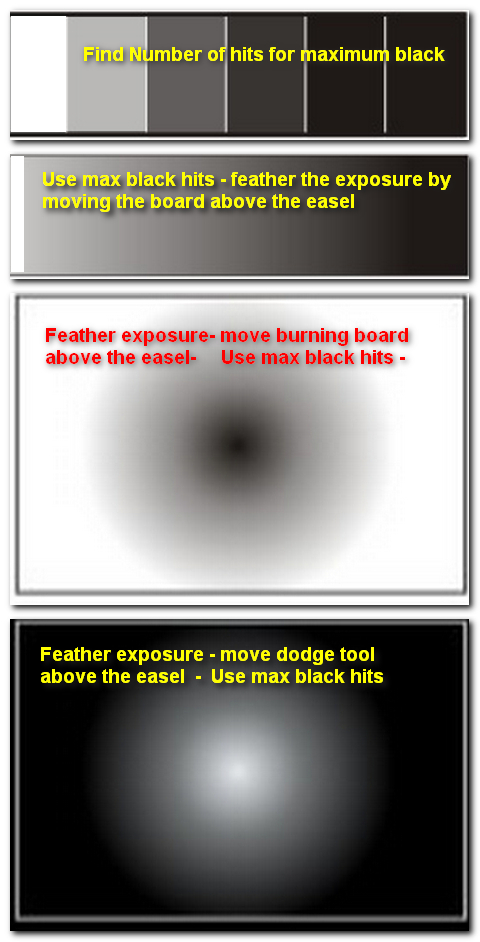
1) Make a test strip to determine "Minimum time- Maximum Black" (about 8 "hits") this is the exposure used for the rest of the exercise
2) Use cardboard held above the paper to make a smooth grayscale from to black with no visible lines. Keep the cardboard moving during all hits.
3) Use cardboard with a hole in center to make a graduated spot in the center of a 1 /4 sheet of paper-
Use the time determined for max black
4) Use the wire dodging tool to make a graduated light spot in the center of a 1/4 sheet of paper
Use the time determined for max black
Label and turn in the four pieces created in this exercise
Sample Images for Burn and Dodge
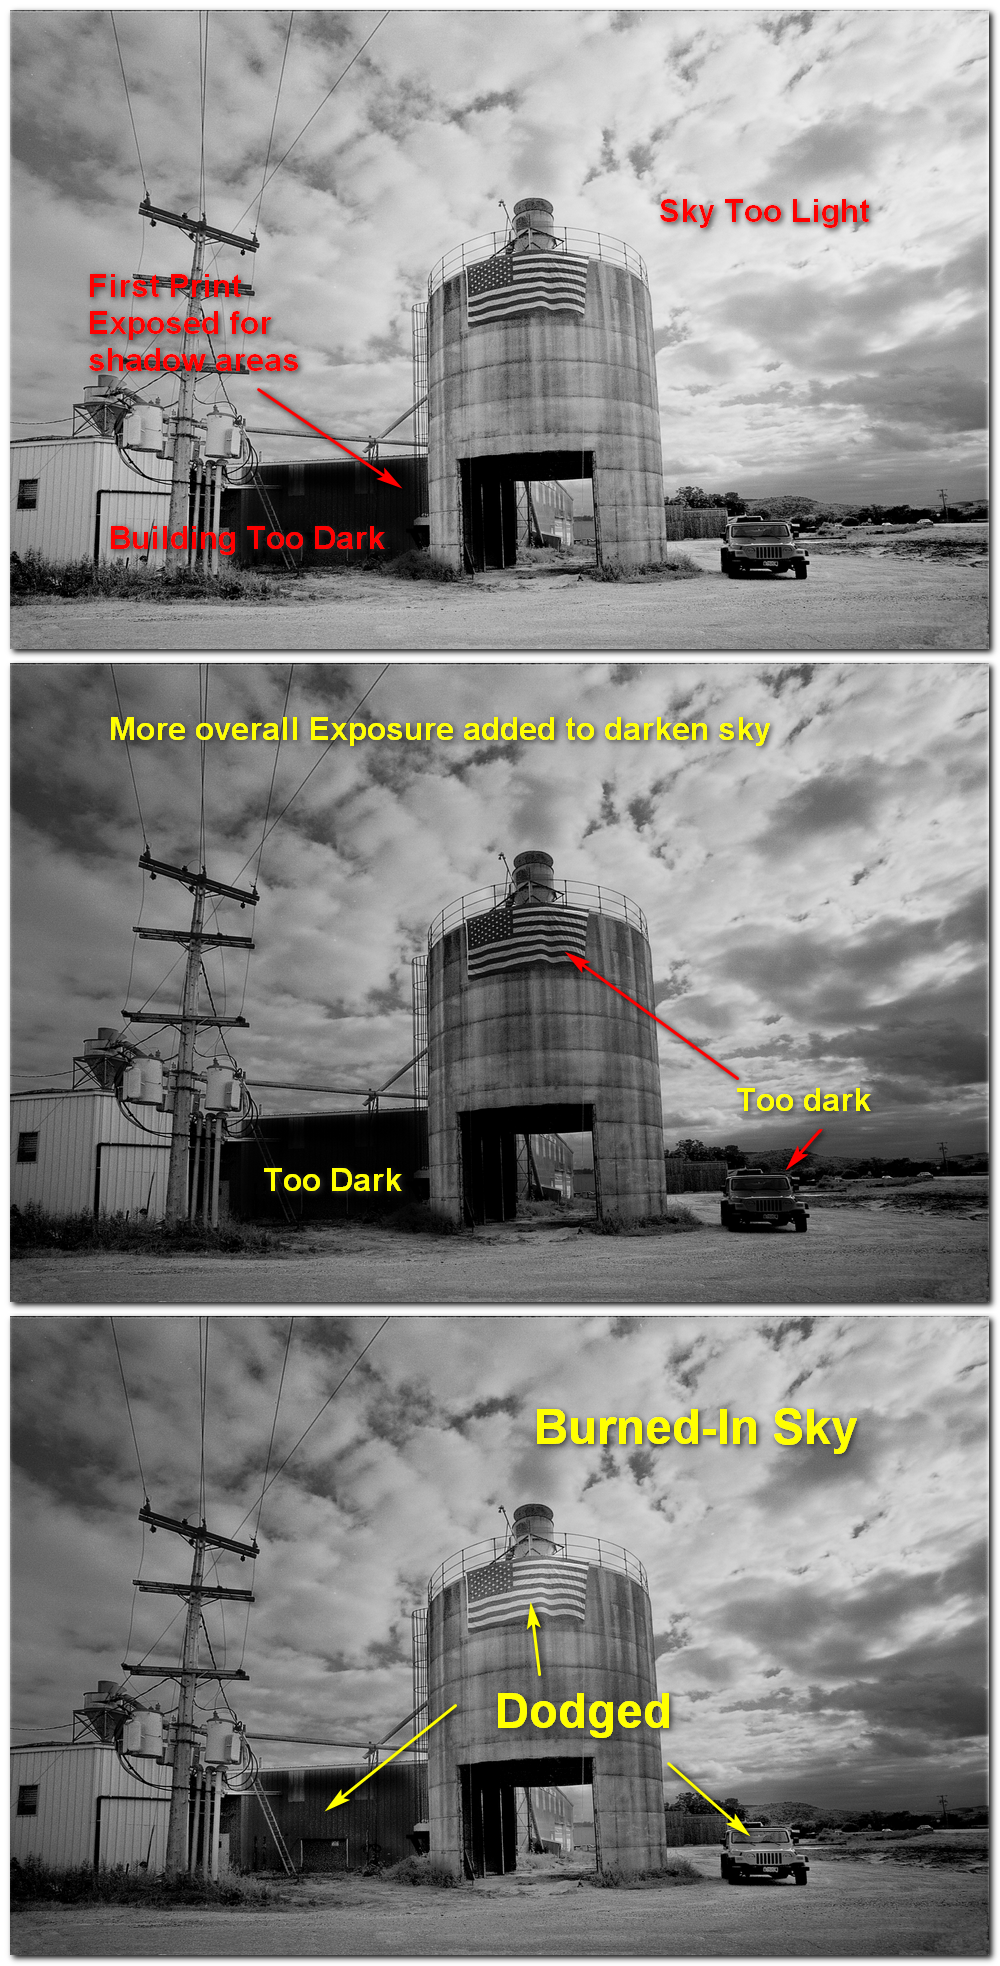
Negative printed straight , making shadow areas (darkest ) maximum black.
The sky is too light - some of the clouds are pure white and the overall sky looks washed out, could use more drama.
The overall exposure ws increased to make the sky darker but the building, flag and jeep went too dark.
The final exposure was made with the increased ecposure but the flag, jeep and building were dodged out to make lighter.
